MCX Services
Real-time Visual Collaboration for Mission Critical Services

The Eyeson Stream Deck Plugin allows you to adapt the layout of your real-time communication swiftly - to show Eyeson One View's situational flexibility. Real-time communication with Omnimedia is a powerful way to exchange and visualize facts. The plugin can assist you in streamlining and enhancing your real-time communication.
This article will lead you through the ranks from the mere basics to the elite by showing you how to make simple steps before you can participate in a parkour. It is more a companion to get acquainted with the functions and show you ideas than a click tutorial.
Level 1: First steps
Level 2: Running
Level 3: Parkour
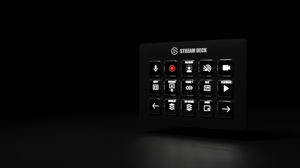
The Elgato Stream Deck is a customizable hardware accessory designed originally for streamers and content creators. It features a set of physical buttons, each with its own tiny, customizable LCD screen, allowing users to assign and execute a variety of commands and actions with a single press.
One of the interesting advanced features is the ability to create so-called Multi Actions or Multi Action Switches. This allows you to assemble sequences of actions.
Installing the Eyeson Stream Deck Plugin is as easy as selecting the plugin on the Elgato Stream Deck Marketplace and clicking the button reading Get. Until the plugin is in the store you can download it from https://explore.eyeson.com/stream-deck-plugin.
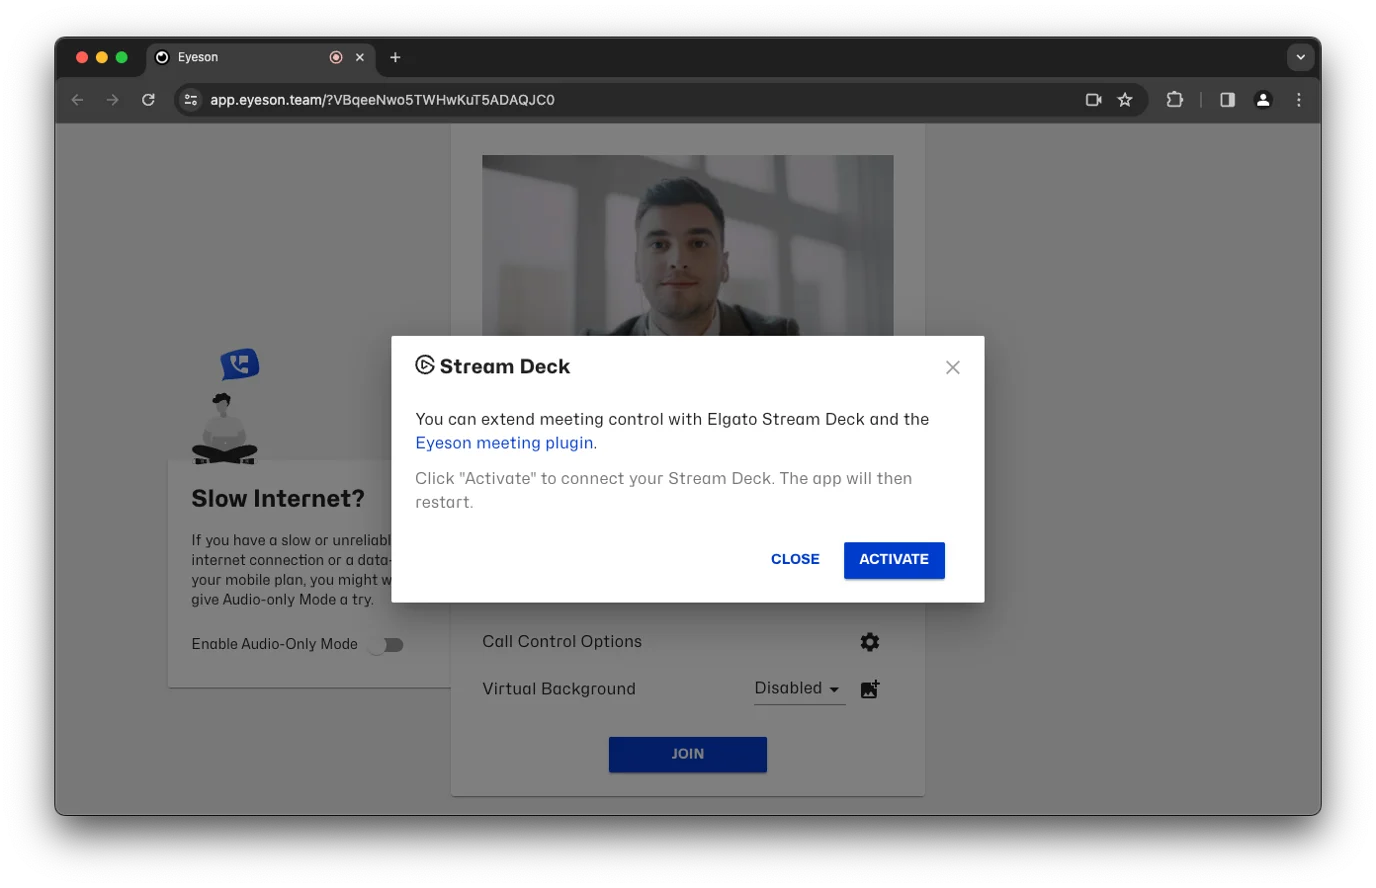
Activating the Eyeson Stream Deck requires a started meeting.
If you have a license, simply start a meeting and select the stream deck from the call control options. Activate the stream deck support.
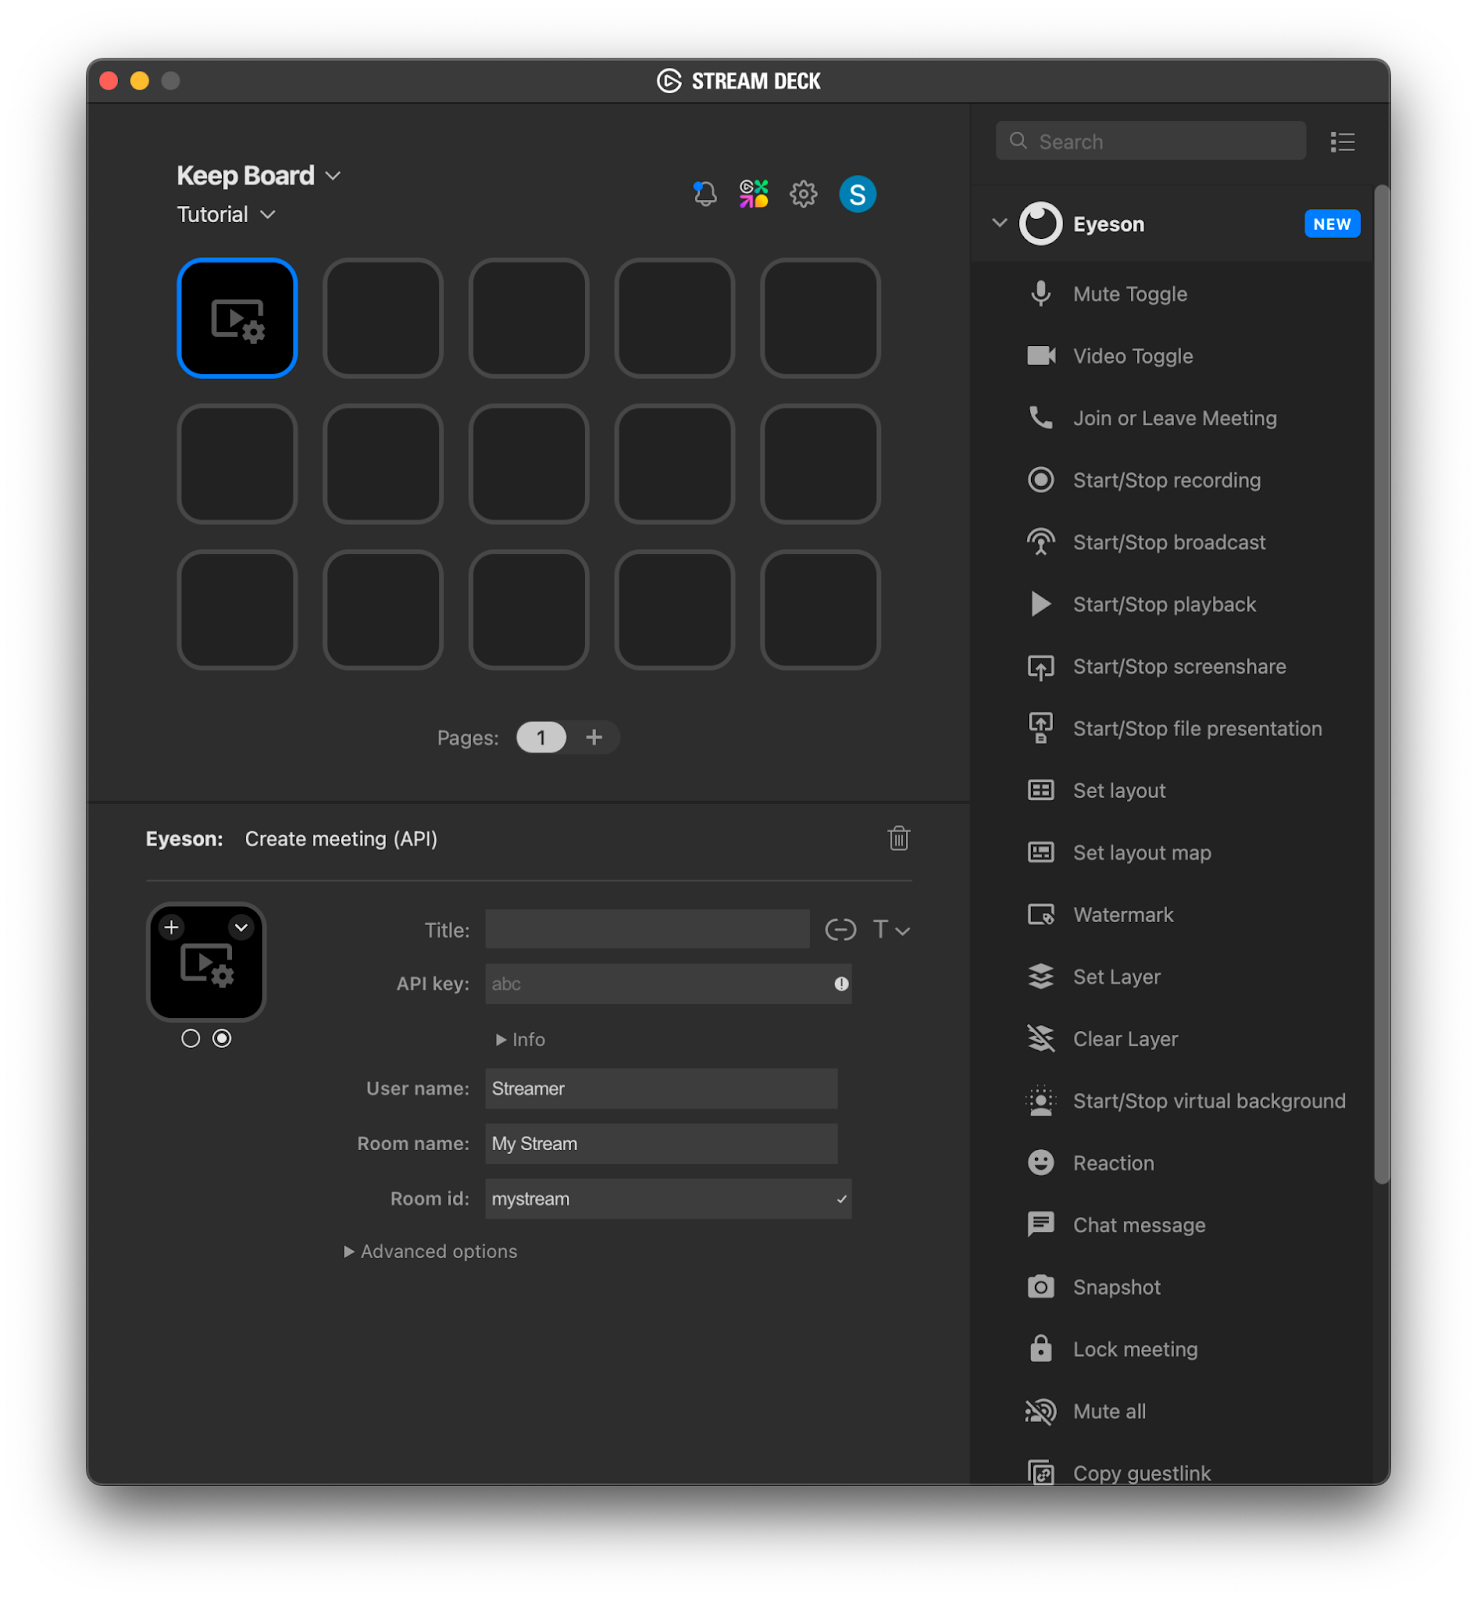
If you are new to Eyeson, we will use the Stream Deck Plugin before activating the GUI functionality. Let’s drag and drop Create Meeting (API) functionality onto a fresh page or profile.
I can hear you: Where do I take the API key from? Open the Info section under the form field for the API key and click on the link to the developer portal to create a developer account and retrieve an API key (you will find it in your dashboard settings).
Since this is your first meeting, let’s create it in a professional way and not some random “Hello World” mode.
Click the button (imagine a #drumroll in the background), and a new window will open where you can change the call control settings as mentioned above.
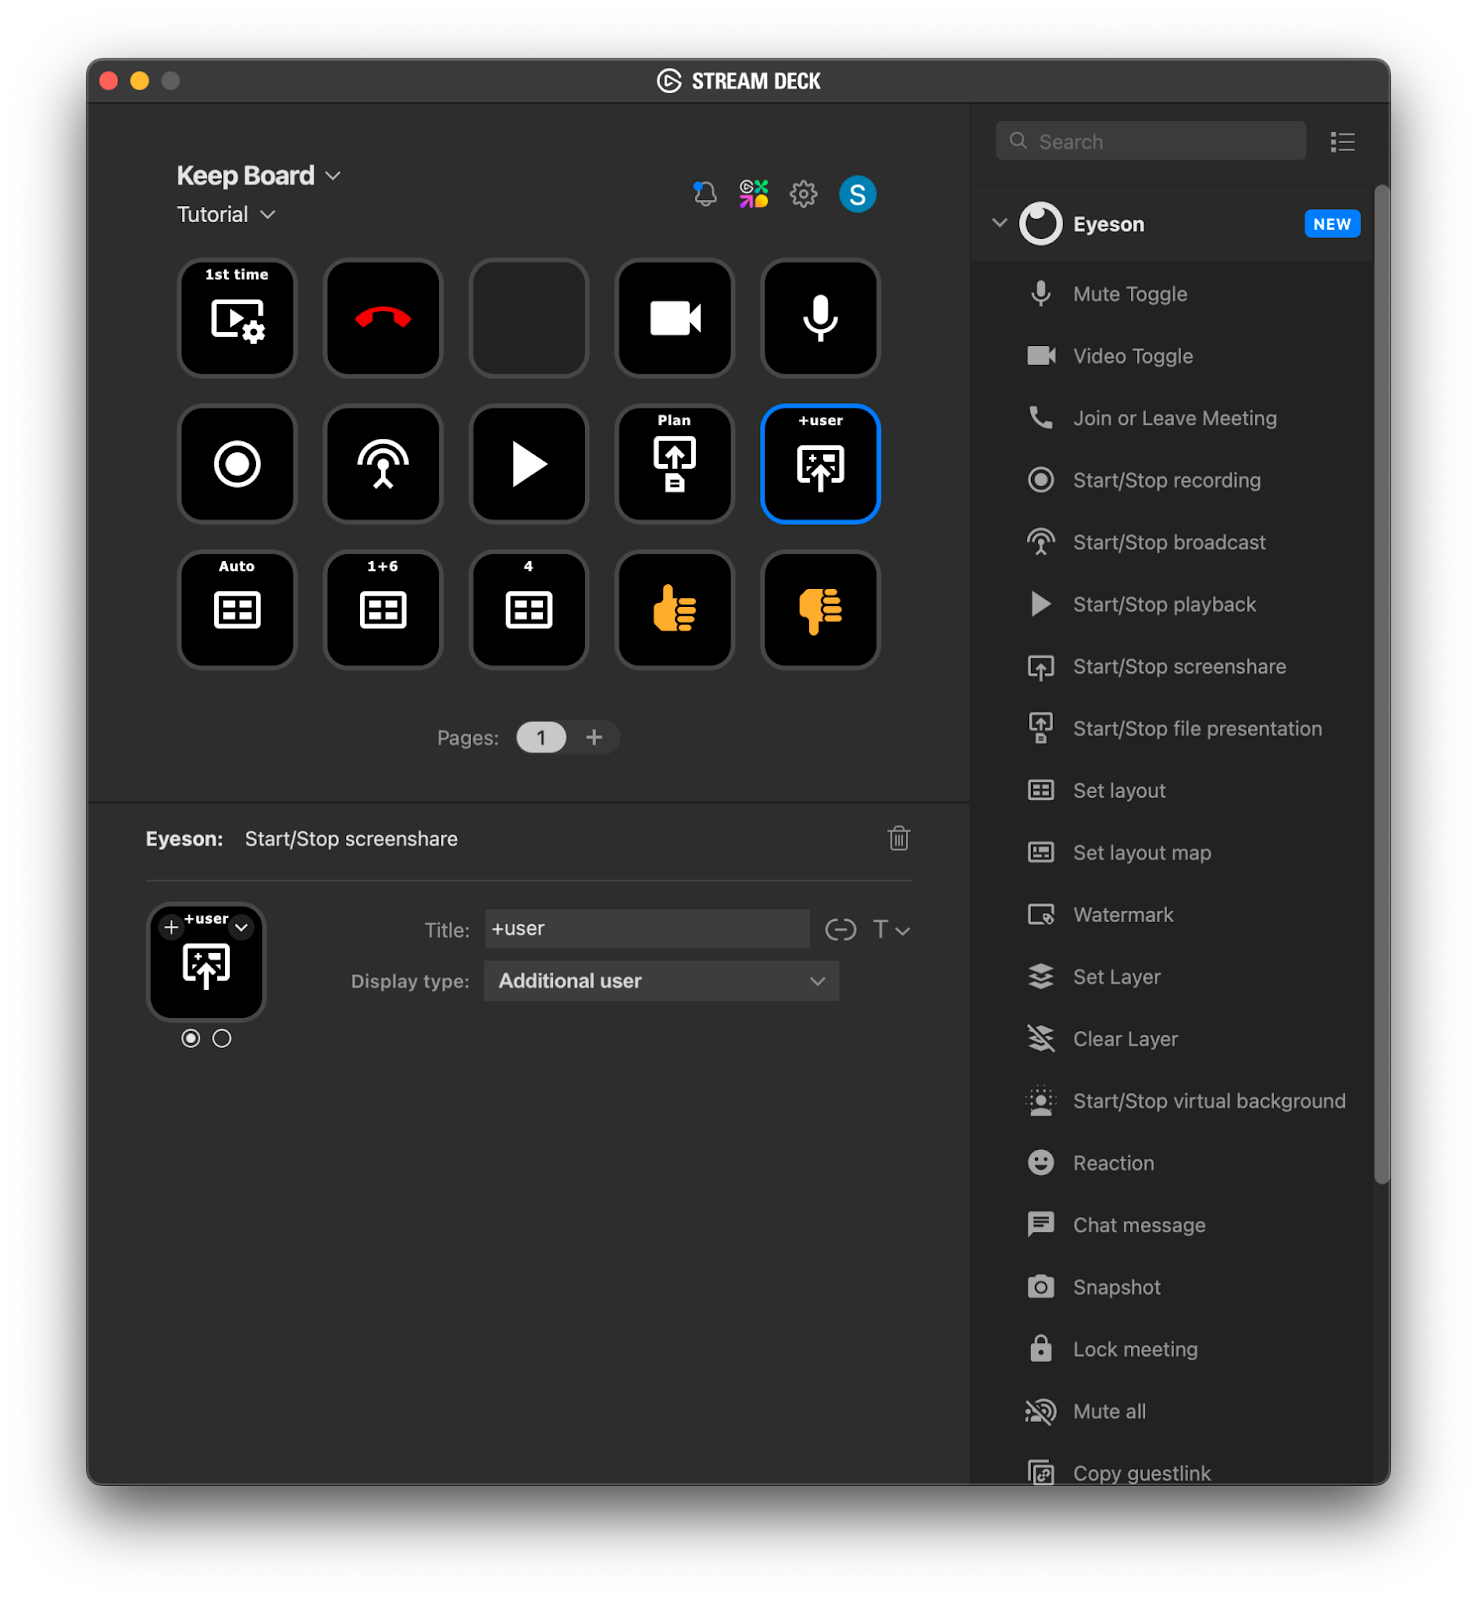
Let’s build an example page with things you need daily. This includes controlling your participation and recording, streaming, and sharing content.
Most of the things work like you would expect them to. Some do more than that. It is obvious how the Join, Microphone, Camera, and Record buttons work. Streaming is also apparent (if you know how to use a streaming service).
Playback, lets you play a video or audio file. The specialty is that you can tell it to loop and play it as a standalone or even replace the self-video. Before you ask: Yes, you can playback a GIF instead of your video. If you want to be more sophisticated you can playback an audio signal to signal that there are only 10 minutes left in the call. Or you have a slot reserved in your layout for playing a video doing the same thing.
File Presentation is a fantastic tool for sharing documents without showing the desktop. Documents includes images, video, and PDF files. I use it to walk people through contracts or anything I need in a call.
Screensharing is controversial in a business context due to confidentiality and privacy issues. But still, it is a daily need for a lot of us. With Eyeson One View you can choose between three display types:
The bottom row on the basic example starts with three layout buttons.
Last but not least I added two reaction buttons. One button is for a thumbs up and another is for a thumbs down. These buttons play an animated GIF instead of your video corresponding to the reaction.
By now you know the basics of Eyeson One View. You are now entering the zone where you graduate to the master of ceremonies for real-time omnimedia communication. We will put layouts and customization in place, work with layers, and create engagement and interaction within the call.
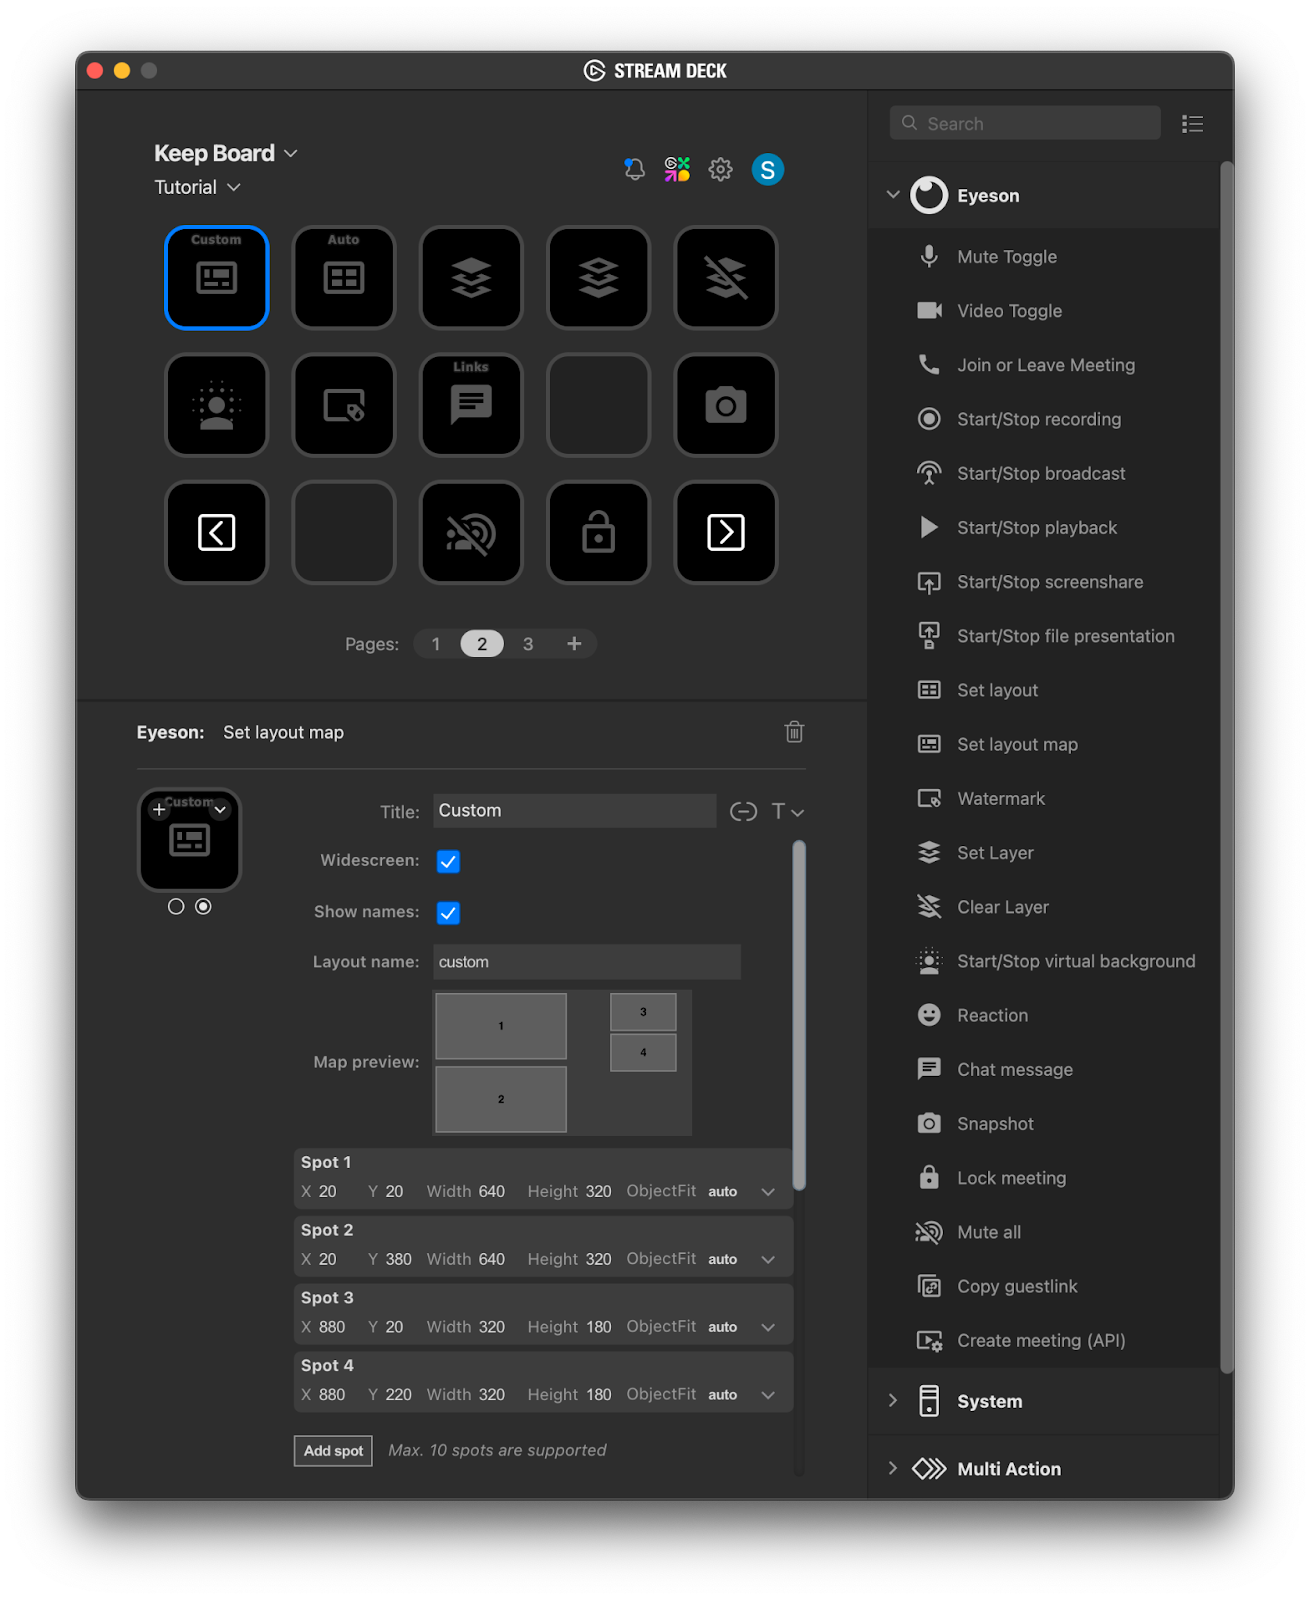
It is now time to move into uncharted territory. Let’s set a custom layout, a layout you came up with. To not stress you I created a Layout Map we can use. If you are interested in how this works, head to the tech blog and read Custom layout map API .
[
  [20, 20, 640, 320, "auto"],
  [20, 380, 640, 320, "auto"],
  [880, 20, 320, 180, "auto"],
  [880, 220, 320, 180, "auto"]
]
The screenshot with the new page on my Stream Deck shows that I have already pasted the map. Open the advanced options and click on import. A small window opens where you paste the code from above. Of course, you can change the map and adjust it to your liking or use case.
Keeping an Auto Layout button close by is good practice since you might want to get out of the custom layout.
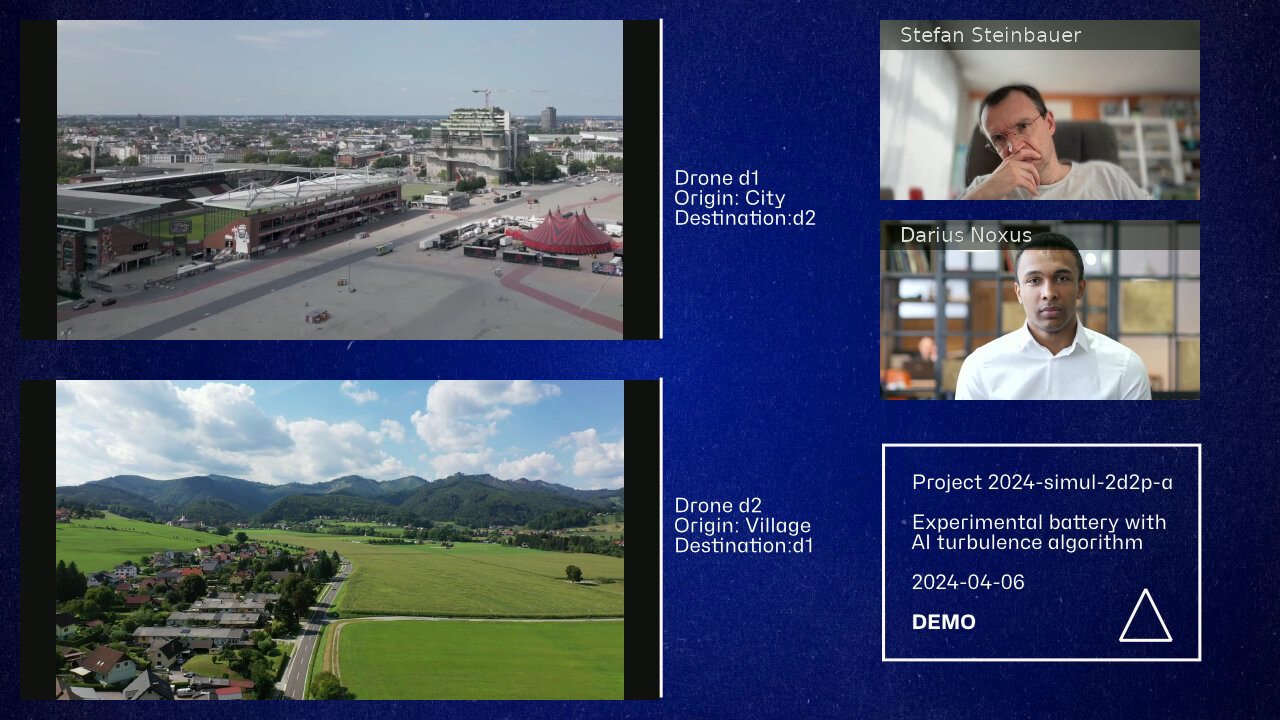
However, the layout map is only a third of the picture. This is why I also have two Set Layer buttons. One for the background and one for the foreground. Next to it is a Clear Layer because the layers are persistent and will not get cleared if you change the Layout. So, in my case, I added two drones and another person to the call and did a fantasy overlay with Text Elements. This looks like this.
An even simpler use case would be to add a Watermark. You can add a logo to your call, position it, and scale it relative to the video width. Make your marketing people happy by adding some margin around the graphics, and you will be good to go. But it does not stop there. You can also use it to add some pop-over graphics into the call foreground. Since this action is setting a foreground layer you can remove the logo or image by using Clear layer.
Snapshot, a screenshot of the video canvas, is a functionality we often use. It serves various purposes: From KYC to documentation of an on-screen moment, from a team picture to documentation.
Since I said at the beginning of the call that you will be the Master of Ceremonies, you will need the following two buttons regularly: Mute All (which does just that) and Lock Meeting. Nobody can get in once a meeting is locked and the meeting is strictly confidential. You will need to stop the meeting to unlock it again.
Start/Stop Virtual Background: When you want to show something to the camera but it always gets out of focus, this is for you.
Chat Message: This is handy for prepared meetings (like project presentations) where you know you must share a link at a certain time. Just one click.
Level 3 will have to wait for the next update of our plugin. Then, you will learn how to add
RTSP Clients and RTMP Servers, building custom sound and gif boards, and what to consider when adding Eyeson to multi-action sequences.
I wanted you to see and experience that Eyeson’s flexibility allows you to create custom and complex communication easily. If you steer the meeting by code, the options get even more advanced, and you can add information from your systems, APIs, IoT devices, and so on. If you have any questions or suggestions on topics, please send me a message.