
MCX Services
Real-time Visual Collaboration for Mission Critical Services

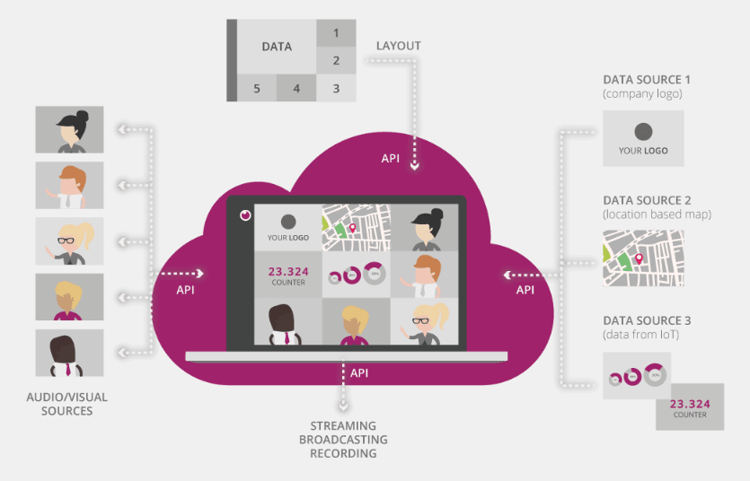
WebRTC provides a modern approach to enable real-time communication from all major browsers without the need for any plugins or extensions. Using WebRTC and the eyeson JavaScript library you can build your own web interface without the need of managing connections or hardware devices. It also provides a powerful API to handle recordings, screen sharing, broadcasts, media into video injection, or group chats. This article provides an introduction on how to setup your own web-based video client application and describes ways to enhance any video and audio call with additional features.
Using the eyeson API service to create your own video meeting is no more than sending a simple REST request. Beyond you can build your own custom interface for any web application or website. The eyeson JavaScript library provides you with a simple interface to use with any modern UI framework or plain old JavaScript if preferred. It has an event-based approach to manage updates on the meeting session, and ships with utilities and helpers to solve common challenges.
In addition to the blog post, you can check out the eyeson React example to see a minimal web GUI with eyeson service. For the given code examples we do not use the latest JavaScript syntax on purpose. We also store the state in some variables that are expected to be available in the code snippets scope. However, it might be a good thing to use some kind of state handling if not already provided by any framework in use.
Before we start ensure that you have added the eyeson library to your projects JavaScript dependencies using npm i --save eyeson or yarn add eyeson respectively. Now that we have eyeson on board we can prepare to listen to events. Due to the asynchronous nature of JavaScript we can register any handling for our events, choose the right strategy to react and execute. To ensure we do not miss any event between initializing the connection and attaching our handler, we implement this beforehand.
var eventHandler = function(event) {
  console.debug('[eyeson]', 'event received:', event);
  /* ... */
};
eyeson.onEvent(eventHandler);
eyeson.start(token); // access key received from the api.
In order to act on a given event, it would be nice to setup a small strategy factory. We are eager to receive the connection accept event in order to attach our video stream to an actual video DOM element.
// var video; ... some DOM video element
var eventHandler = function(event) {
  var actions = {
    accept: function() {
      localStream = event.localStream; // save our source media stream
      video.srcObject = event.remoteStream;
      video.play();
    },
    default: function(event) {
      console.debug('[eyeson]', 'event received:', event);
    }
  };
  return (actions[event.type] || actions['default'])(event);
};
That’s enough to be ready to connect our participants and provide video and audio real-time communication.
As described in the documentation, there are two events we have to observe in order to keep track of who joins and leaves the video session. Those are add_user and remove_user.
// var eventHandler...
  add_user: function(event) {
    participants = [...participants, event.user];
  },
  remove_user: function(event) {
    participants = participants.filter(function(user) => {
        return event.user.id !== user.id;
      });
},Another highly required feature for our participants is to mute and unmute the camera or microphone. This can be controlled by sending the desired state to eyeson. Under the hood eyeson will actually update the media stream details and provide an updated version to the session. This in fact has the advantage that a mute command on the camera does no longer send any data. That comes in handy when someone has a really bad connection it can save a few bits.
// var soundBar; ... some DOM element
var soundMeter = eyeson.SoundMeter.new();
soundMeter
  .connectToSource(localStream)
  .onUpdate(function(event) {
    if (event.error) {
      return; // guard any errors
    }
    soundBar.style.height = '' + event.level + '%'; // set height to 0 - 100%
  });
// call soundMeter.stop(); when done...As the user cannot hear the own sounds produced but only the other participants can, your interface could provide a graphical presentation of the current audio level. This requires selecting the current microphone device and reading its changes during specific intervals. The eyeson library has a built-in utility that can help visualize the sound produced.
// var soundBar; ... some DOM element
var soundMeter = eyeson.SoundMeter.new();
soundMeter
  .connectToSource(localStream)
  .onUpdate(function(event) {
    if (event.error) {
      return; // guard any errors
    }
    soundBar.style.height = '' + event.level + '%'; // set height to 0 - 100%
  });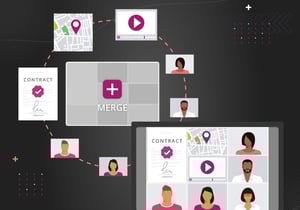
// call soundMeter.stop(); when done...Now that you know how to receive and act on events, send events and use the utilities, you are ready to enhance your custom interface using YouTube or Facebook broadcasts, record your sessions, invite guests during the session, or provide a device manager to switch to different cameras or microphones on-the-fly. If you want to take it even one step further inject media like videos, (animated) images, graphics like statistics directly into the video that will be also available automatically in recordings and live streams.
