
MCX Services
Real-time Visual Collaboration for Mission Critical Services

Adding your company or personal logo is an easy way to customize the experience. Explore two ways to display a logo on your Eyeson video call.
The first option is to customize the logo in the default UI. This option can be set in the API’s Start meeting request. Read more here.

This code creates a new Eyeson meeting room for a user and customizes it to display a specific logo image.
Another option is to put a logo in the video. To do this, you need to follow the instructions below:
Select a local image file from the computer, load it into memory as an Image object, and return it:

The next step is to create a canvas and convert it to a blob:

Send the image blob as a layer to an Eyeson meeting:

Now that all functions are ready call each in the correct order:

Some tips when setting a custom logo:
Read more about the overlay image and local images.
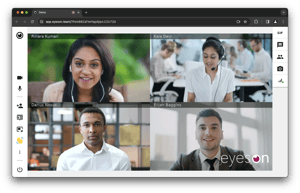
Explore the second way in action on a screenshot below:

With just a few lines of code or a quick upload, you can add your unique logo or branding to Eyeson calls. Read our tech blog and submit a ticket on GitHub for any special questions/requests.
