
Frequentis
Redefining Visual Situation Awareness & Communications for Public Safety Teams

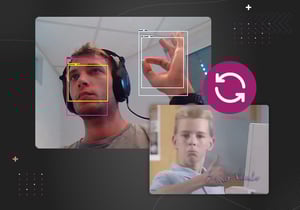
In this article, we’ll share how we used TensorFlow’s object detection API to build a custom image annotation service for eyeson. Below you can see an example where Philipp is making the “thinking” 🤔 pose during a meeting which automatically triggers a GIF reaction.
The idea for this project came up in one of our stand-up meetings. After we introduced GIF reactions to eyeson we thought about marrying that feature with some machine learning. As we wanted to do some rudimentary form of “sentimental analysis” on a frame from a video meeting and display a GIF matching the reaction of the participant.
eyeson’s GIF reactions - the pinnacle of 21st-century video meeting technology.
We initially played around with a couple of machine learning services like Cloud Vision and Azure Machine Learning. And although these services are very convenient and provide some impressive results, we wanted a bit more flexibility, control and fun. Therefore we decided to try TensorFlow’s object detection API.
If you’re interested in playing around with it yourself, follow this guide and read through the documentation on GitHub.
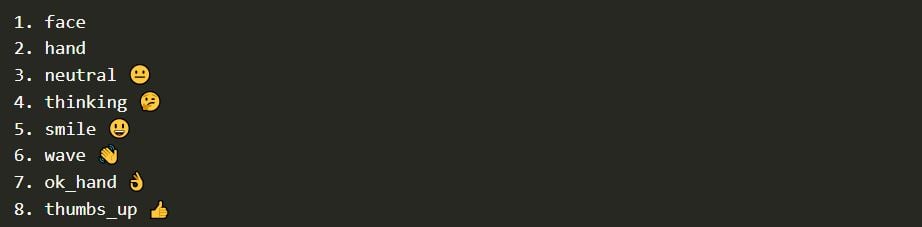
For our project we wanted to annotate images with the following labels:
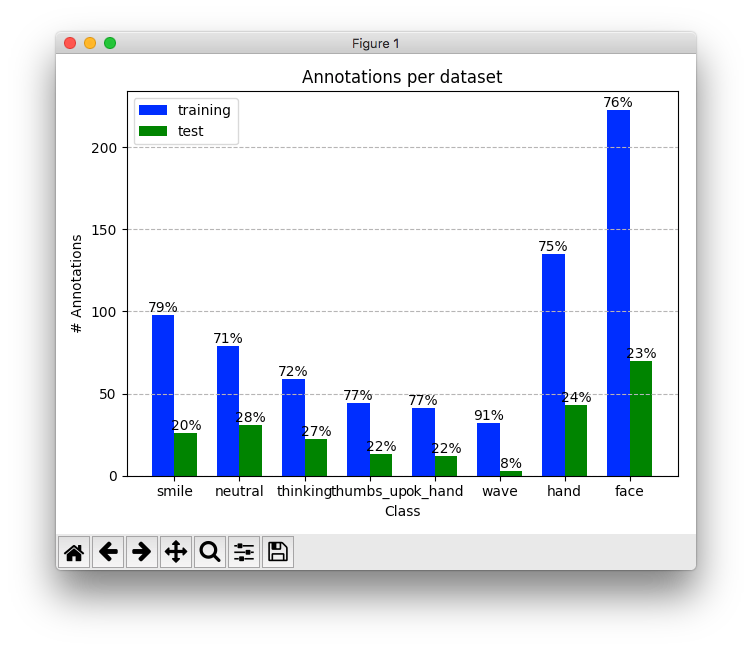
This leaves us with the following distribution of test and training data. The bar chart gives us an idea about the number of annotations and how they’re split up between labels and the test and training datasets.
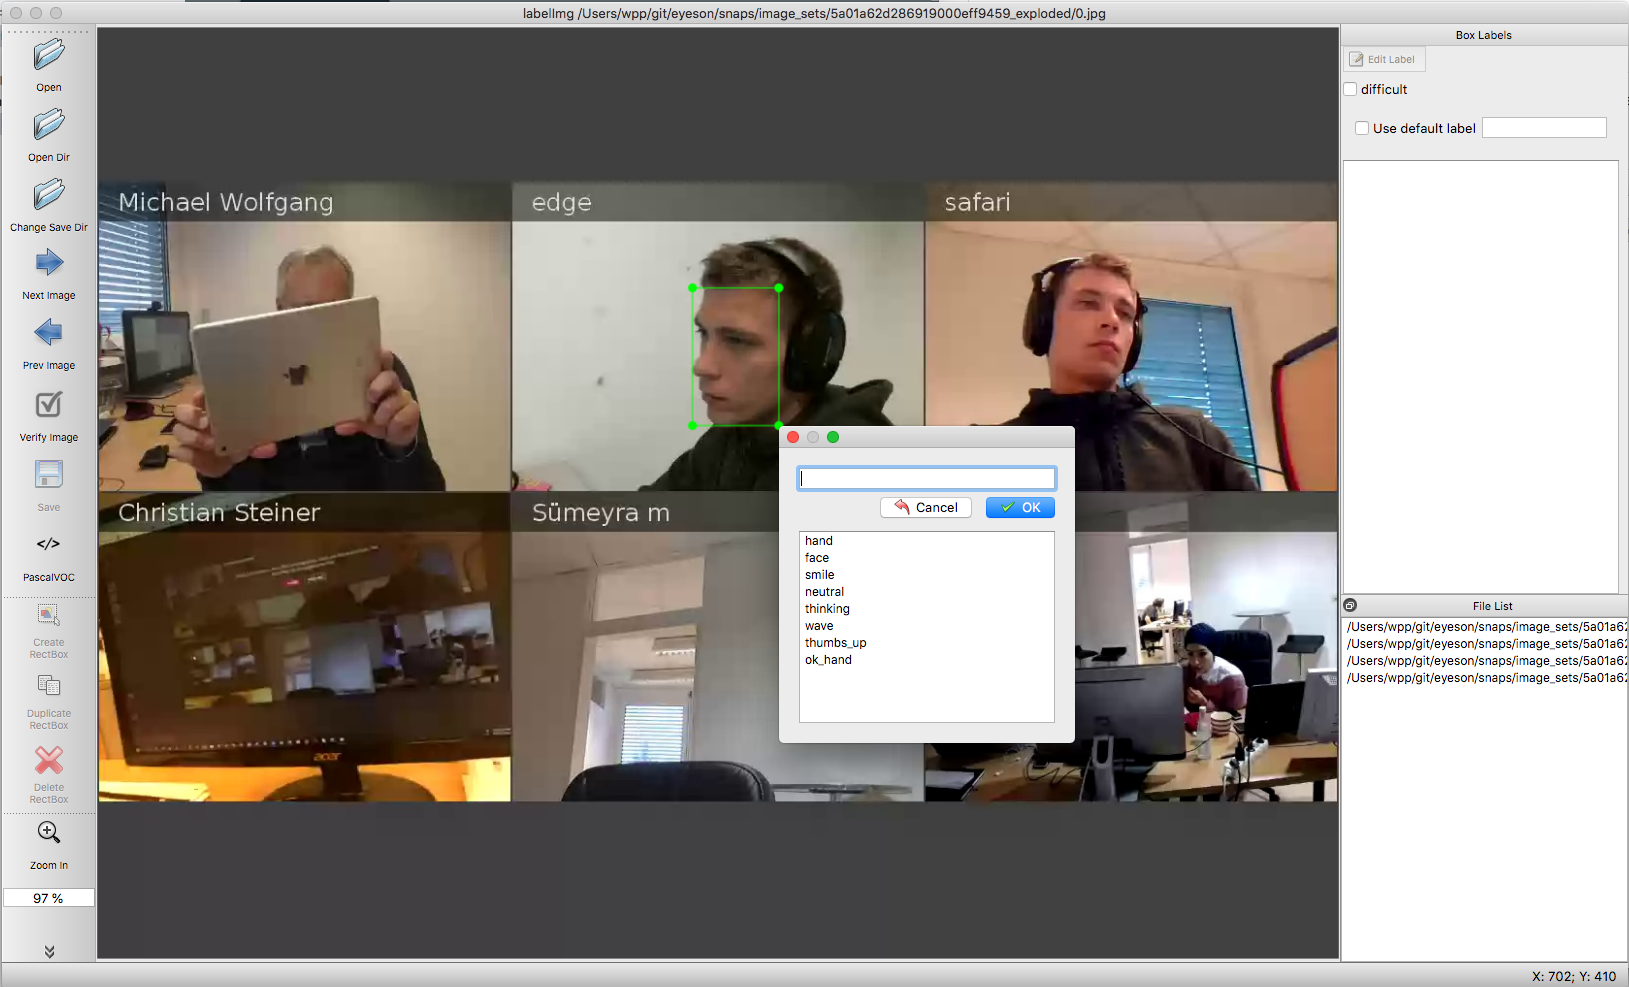
To annotate our images we used labellmg. The tool spits out an XML file for each image. After completing your annotations, these XML files need to be converted and fed into our model.
The actual training was done via Google Cloud. Unfortunately, we encountered an UnavailableError: OS Error while training on the ML Engine. There doesn’t seem to be a resolution for this issue yet but as luck would have it our error rate was low enough at that point to export and download our checkpoint. The final step was to generate our inference graph.
Since we’ve been using Go for a couple of our services and we’ve been happy with the results we also wanted to use it for the annotation service. It turns out that the Tensorflow Go documentation is a bit sparse and lacks examples so writing the service part turned out to be a bit more time-intensive than our initial Python version. We added a simple REST interface that looks something like this:

Another challenge was the construction of the docker image. Since the go bindings rely on Tensorflow and its C library, and we have to add our inference graph, the first image turned out to be rather large ~3GB. We absolutely wanted to keep the service image small so we extracted the build process into its own image and only produce a binary artifact which, still relies on the Tensorflow C lib but reduced the size of the image to a more manageable ~315MB.
An SFU only system would have required implementing the memelearning service on all client platforms. Since we have a unique combination of SFU and MCU systems, it was obvious to go for a server-side integration. The MCU samples each clients’ video stream, sends it to the memelearning service, retrieves the classification result, and forwards it to the API. The API then decides what GIF reaction to inject into the live video stream.
With the objective of a real-time service, it was clear to go for GPU power. So we set up a Kubernetes cluster with GPU workers. The TensorFlow docker images had to be recompiled to include the GPU-variant of the Tensorflow C library.
With one Tesla K80i, 5 requests per second have been reached, with a Tesla V100, 8 requests per second. This is not perfect, but good enough to handle the AI traffic for one conference. Horizontal scale-up is easy thanks to Kubernetes et al.
Here is a demo video of the finished project.
The results are promising but could certainly be improved with a larger set of training images. Increasing the size and quality of our training data would be a logical next step.
To speed up the annotations we could scale the current architecture horizontally aka. “throw more computational resources at the problem”, the obvious drawback being a larger cloud bill. A better approach might revisit base training models with a focus on speed (e.g ssd_mobilenet_v1_coco).
More labels - more fun. Extending the set of labels to situations which might be typical for a video conference, like “drinking coffee”, would be nice.